Introduction to 2D graphics
1. Nintendo DS graphics
The Nintendo DS has two graphics engines: a main engine and a sub engine. The sub engine is a 2D-only graphics engine that can display up to 4 background layers and 128 sprites. It can also apply some effects like alpha blending between layers, or fade to white/black. The main engine has as many features as the sub engine, with slightly expanded 2D features, and a completely new 3D graphics engine. The engines aren’t fixed to a screen: you can swap them freely.
We will get our first example of how to get graphics on the screen in the next chapter. First, we need to clarify a few general concepts. The 2D graphics engines of the NDS are really flexible, so you need to understand the options they give you.
2. Bitmap versus tiled graphics
The first distinction we need to make is between tiled and bitmap graphics.
-
Bitmaps are just regular images that don’t follow any specific pattern or have any restriction in the way the image is created. They use as much memory as the amount of pixels in the image. This is the normal way you think of images.
Check this chapter of Tonc for a more detailed explanation. Tonc is a tutorial of GBA programming, but the 2D engines of the NDS are like the one of the GBA, but with some improvements.
-
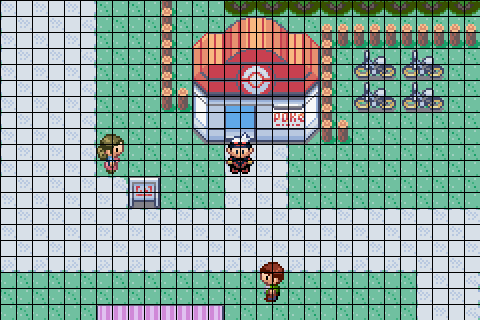
Tiled images are composed by small squares (tiles) that are put together in a way that can form bigger images. The DS uses 8x8 pixel tiles. You are likely to be familiar with the feel of tiled graphics because of the repetitive feel that some images have. For example, you can see the tiles that form the background in this screenshot:
Check this chapter of Tonc for a more detailed explanation.
The biggest advantage of tiled graphics is that they help you save memory. Instead of having a 256x256 bitmap, for example, you can have a few 8x8 tiles and a 32x32 map that tells you which tile to use in each position of the grid. However, your graphics need to be designed in a grid-like way so that there are repeated tiles and there can actually be memory savings.
Another advantage is that it’s a lot faster to scroll tiled backgrounds than bitmap backgrounds. If you have a tiled background that goes over the sizes supported by the hardware, you need to manually edit the background that the hardware displays. This will be described in a future chapter of the tutorial.
In general, it’s a good idea to use tiled graphics whenever possible. In most cases, you can use your regular graphics editor to create an image that follows this 8x8 grid and let the tooling of BlocksDS convert it to the right format for the DS.
3. Paletted vs direct color graphics
Bitmap graphics come in two types: paletted and direct-color:
-
Direct-color images are images in which the real color of each pixel is stored directly. If you have a 256x256 pixel image, and the size of a color is 2 bytes (16 bits), the final size of your image is 256x256x2 bytes.
-
Paletted images are images in which the list of used colors is stored separately from the bitmap, and each pixel of the bitmap contains the number of the color of the palette that they use. In the case of the DS, palettes can have either 16 or 256 colors. For example, for a 256x256 pixel image with a 100 color palette you only need 256x256 bytes for the background plus 100x2 bytes for the colors.
The biggest reason to use paletted images is that it saves memory. Also, it’s important to remember that tiled graphics in the Nintendo DS are always paletted.
The last thing to remember is that bitmap backgrounds on the DS can only use 256-color palettes, but tiled backgrounds can use a different mode in which they use 16 different 16-color palettes.
There is also a special system called “extended palettes”. Normally you only have access to one 256-color palette for sprites, another one for backgrounds, and it can also be used as 16 palettes of 16 colors. However, with extended palettes you can have up to 16 palettes with 256-color each. You can have up to 16 different palettes for each background layer and 16 more palettes for sprites.
4. Creating graphics for the DS
In practice you will never need to worry about how graphics are stored in the DS itself. There are conversion tools that can take images in common formats (png, jpg…) and convert them to the right formats for the DS. All you need to do is to give them the right conversion options.
However, you need to careful when you create your images. If you want to use tiled graphics, you should use a graphics design program that lets you stick to a 8x8 grid. If you want to create a paletted image, you should make sure that your program lets you edit the color palette of your image, or that it can reduce the number of colors of your image after you have created it.
The conversor included in BlocksDS is called grit. Most examples of this tutorial will use grit for converting graphics (there will be a small exception when we learn about 3D graphics).
5. Getting graphics displayed
The general workflow to get graphics displayed on the DS is to:
-
Designate some video RAM (VRAM) for the graphics type. For example, if you want to display sprites, you need to designate some VRAM as “sprite RAM”.
-
Copy graphics data to VRAM. Copy palettes to palette RAM if needed.
-
Setup the video hardware registers to fech data from the location in VRAM where you have copied it.
6. How to use VRAM
The DS has 9 VRAM banks of different sizes.
- VRAM A, B, C, D: 128 KB each. They are the “main” VRAM banks.
- VRAM E: 64 KB
- VRAM F, G: 16 KB
- VRAM H: 32 KB
- VRAM I: 16 KB
Banks have specific purposes: you can’t use any bank for main engine sprites, or sub engine backgrounds, for example. Instead of explaining it here, you can check the following tool by mtheall & JustBurn to see which banks can be used for which purposes:
https://mtheall.com/banks.html
This is a quick explanation of how you use VRAM:
-
Normally, VRAM is in “LCD” mode. This means that VRAM is accessible starting at address 0x6800000. You can use defines
VRAM_AtoVRAM_Ito access VRAM when in LCD mode. -
This mode isn’t very useful, so you need to set VRAM banks to other modes. For example, if you designate VRAM A as main engine sprite memory starting at address 0x6400000. You can access it with
SPRITE_GFX. -
Some modes make VRAM banks completely unavailable to the CPU and only available to the graphics engines. If you designate a VRAM bank as 3D texture or palette VRAM, or as extended texture RAM, it won’t be available to the CPU. You need to switch the bank to LCD mode, copy data, and then set it to the correct mode. Note that VRAM can’t be accessed by the graphics engines while in LCD mode.
Additionally there is some “palette RAM”. Each engine have space for one 256-color palette for sprites and one 256-color palette for backgrounds.
We will get into more detail about how to use each specific type of VRAM in future chapters.